
Cheap Wide Angle solution for the Fuji F30 / F31
Intro
I wanted a wide angle solution for my Fuji F30, but before splashing several hundred notes on the Inon wide angle lens, housing adaptor and lens caddy,
I wanted to see if there was a cheaper alternative.
Having owned a Sea & Sea Motormarine II camera and 20mm wide angle lens in the past, it made sense to see if this bolt-on lens could be re-used
on the F30 / F31 and the appropriate Fuji housing.
The (my) theory goes that with the MM2 boasting a 35mm built in lens, and bolting on the 20mm or 16mm wide angle lenses (0.57x and 0.45x) turns the
camera into that equivalent. So, bolting those same add on lenses onto a Fuji F30 (equivalent zoom range 36mm-108mm) should yield similar results. i.e.
turn the F30 into the relevant wide angle equivalent, give or take a mm.
One cold March shore dive later and it was apparent that a Sea & Sea 16mm wide angle lens works quite happily when hand held in front of the F30
lens port. It followed that the 20mm that had been left at home would be equally at home on the F30. And so it began....
The Bits
The key item to get your hands on, other than the Sea & Sea wide angle lens, is a suitable mount. I had several options...
1. Get an adaptor that will mount the Sea & Sea lens direct to the F30 - not sure if one exists, if it does, I wasn't successful in tracking one
down
2. Butcher a Sea & sea adaptor designed for another camera model
3. Butcher a Motormarine II lens caddy
4 . Butcher a Motormarine II camera
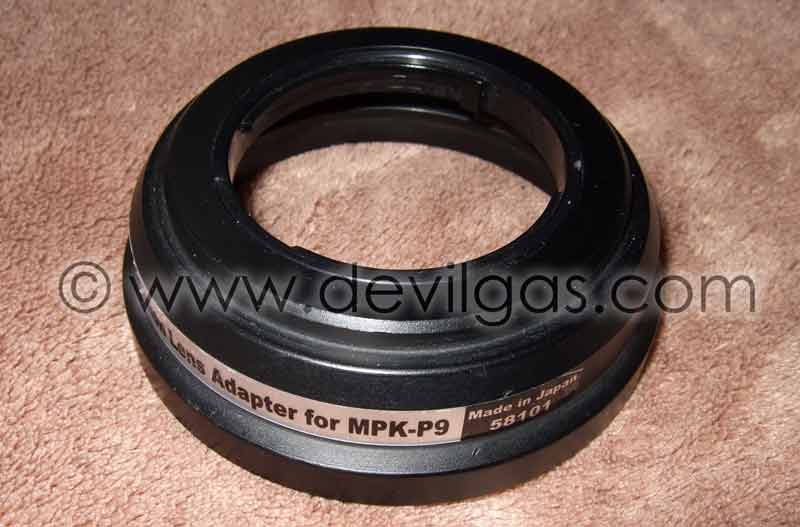
Good old e-bay came to the rescue and I managed to get a Sony MPK-P9 adaptor for about £15
Also managed to get a 16mm wide angle lens for £30
Clearly, a suitable Sea & Sea bayonet lens mount is the key to this project as without one, it'll be more of a challenge.
You need to be careful when buying bits that you are getting like for like. The lenses I already had were the Motormarine II (MM2) bayonet mount system
(and possibly the MX5). This is different to that used on the MX10 and Motormarine I and III camera systems. That said, most digital camera adaptors
are designed to fit to the MM2 accessory lenses as these are generally the most widely available.
At time of writing, there were a few potential donor adaptors priced at a tenner a pop on camerasunderwater
in the 2nd hand / clearance section and various bits and bobs in the Sea & Sea surplus
store and main site (MPK-P5 adaptor for £11.50)
My 1st fall back plan was to acquire a cheap Motormarine camera, probably from ebay, and liberate the bayonet mount - it looks like it should come off
relatively easily - from the yellow casing. Although this is a very wasteful way of doing things as you're semi-trashing what was a £500
camera for a piece of plastic that costs a few pence.
The 2nd fall back plan was to purchase a Sea & Sea Motormarine II lens caddy from somewhere like divebooty
(£30), hacking one of the holders, thus leaving the 2nd holder in a useable state so could still be attached to the Sea & Sea strobe arms
that I have.
The rest of the bits I procured were:-
1.25" bicycle inner tube - approx £2 from ASDA
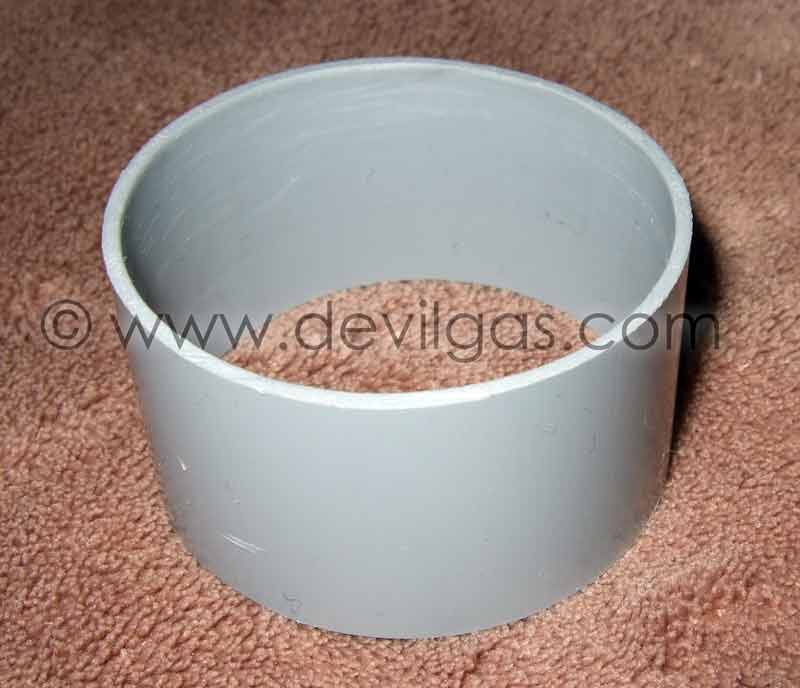
50mm MiniFit Downpipe - £5.67 from Wickes (sold as a 2m length, you need only 25mm or so!)
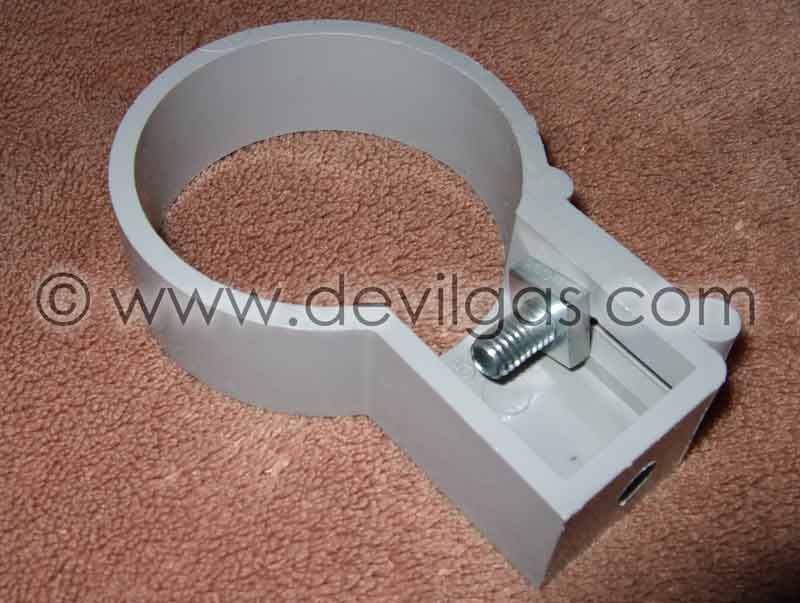
MiniFit Downpipe bracket - £1.07 from Wickes
The 25mm long section of 50mm dia downpipe...
The Minifit downpipe bracket....
It is assumed that you already have some kind of epoxy resin and hot melt glue, some sand paper and a means of cutting the plastic pipe, if not, then
add those items to your list.
The Theory
The internal diameter of the downpipe is about 47mm. The external diameter of the lens port on the Fuji housing is 45mm

As these dimensions are so close, if the lens port barrel were bolstered by a few mm, then the pipe section should push fit over, thus negating the
need for a more substantial mechanical mount.
The solution I arrived at would allow for either configuration, although the push-fit design does the job nicely
The Build
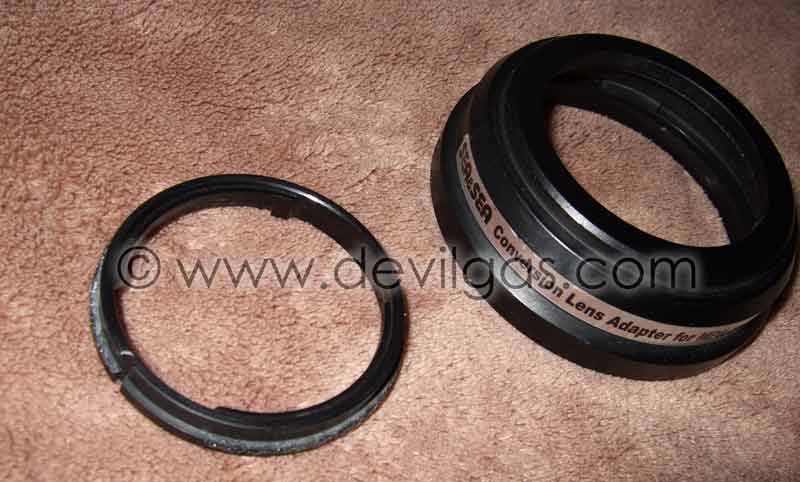
The first thing to do is to get the lens bayonet mount down to a suitable size. I was fortunate with the Sony adaptor in that the bit I really needed
could be relatively easily separated from the rest of the adaptor.
Next you will need to cut a 25mm section from the downpipe. The measurement doesn't need to be exact as the pipe section will fit inside the bracket
and is glued into the correct position..
When cut, use the sandpaper to smooth the edges at the cut and to put a very slight chamfer on the inside edge.
This edge will be placed closest to the camera housing main body.
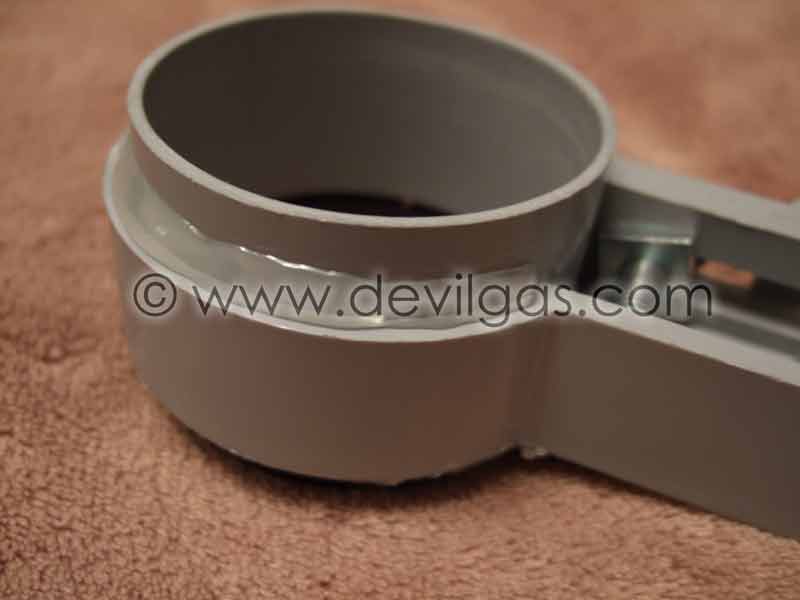
We now build the bracket section. Firstly, tighten the nut and bolt that is used to clamp the bracket together. No need to worry about the 50mm pipe
not fitting as it'll still slide relatively easily within the bracket even after the bolt has been tightened.
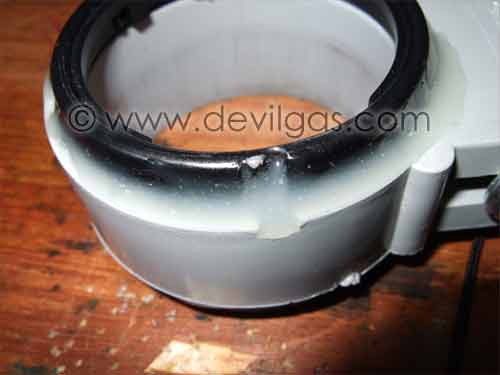
To improve the mechanical strength of the MM2 adaptor to the plastic bracket, cut a few notches into both pieces - the inside / top edge of the bracket
and the outside of the MM2 adaptor. Ideally a number of these notches should align. When the epoxy cures within the notches, the torsional joint strength
will be significantly increased.
You now need to offer the bayonet mount to the bracket - make sure you've got it the correct way around - and hold it in place. I used some tape on
the inside of the bracket and adaptor..
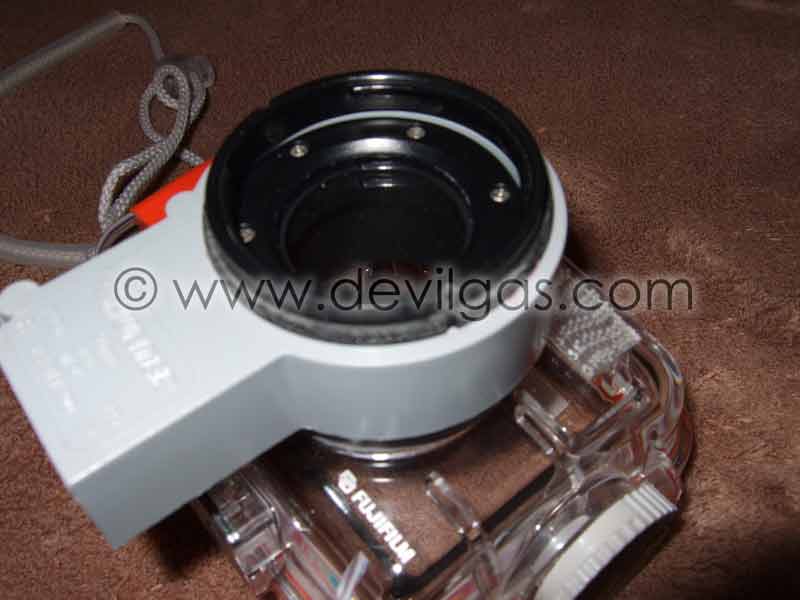
When you've got it centred, epoxy the bayonet mount into place. My initial versions used hot melt glue, which proved to be not very resilient when it
came to cold temperatures and in absorbing the occasional knock - hence the recommendation to add both key notches and to exclusively use epoxy resin.
If the adaptor has vent holes, feel free to leave these uncovered as the add-on lenses require water between them and the camera to work. They're not
critical as long as you remember to release all of the trapped air first (give the camera a good shake while underwater), and leaving them out means
you could use the lens out of water as long as you have water between the wide angle lens and the housing front port.
Next.cut a 15mm wide section of inner tube and place it over the clear part of the lens barrel.
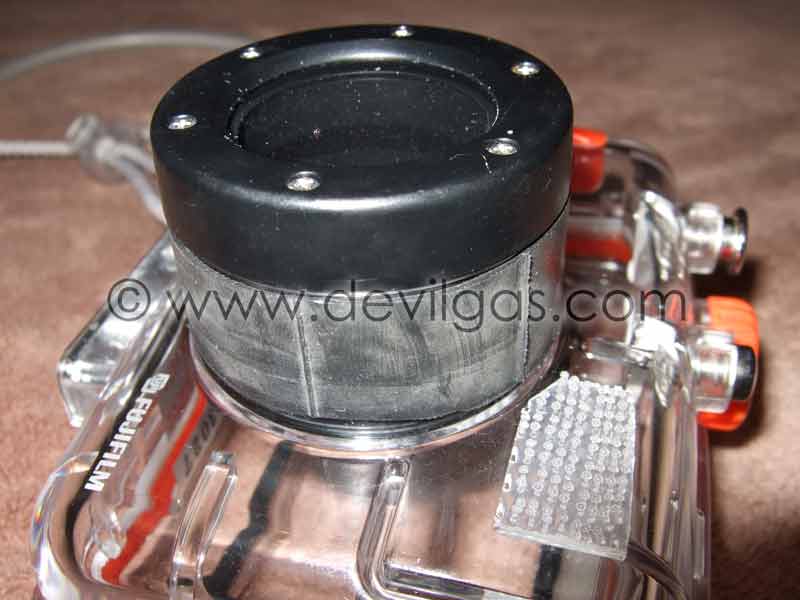
Offer up your 25mm long piece of pipe and check that the fit is snug, but not overly tight. If it isn't, we can remedy this later by wrapping a single
(or more) layer of insulation tape around the lens barrel.
We're now going to marry up the pipe and the bracket....
You need to push the section of pipe into the bracket. Push the pipe so that it is only half way into the bracket.
Push this entire assembly onto the lens port, making sure that the end of the pipe sits flush against the main body of the housing. You can now slide
the bracket body down the 50mm pipe until the bayonet lens adaptor sits flush against the front of the camera port. Either mark the position of the
bracket in relation to the pipe or carefully remove the job from the camera, without upsetting the location of the pipe within the bracket, and fix
the 50mm pipe to the bracket using hot melt glue or epoxy resin.
That's it. All that remains is to add electrical tape to the lens barrel (if required) and test the fit with your wide angle lens.
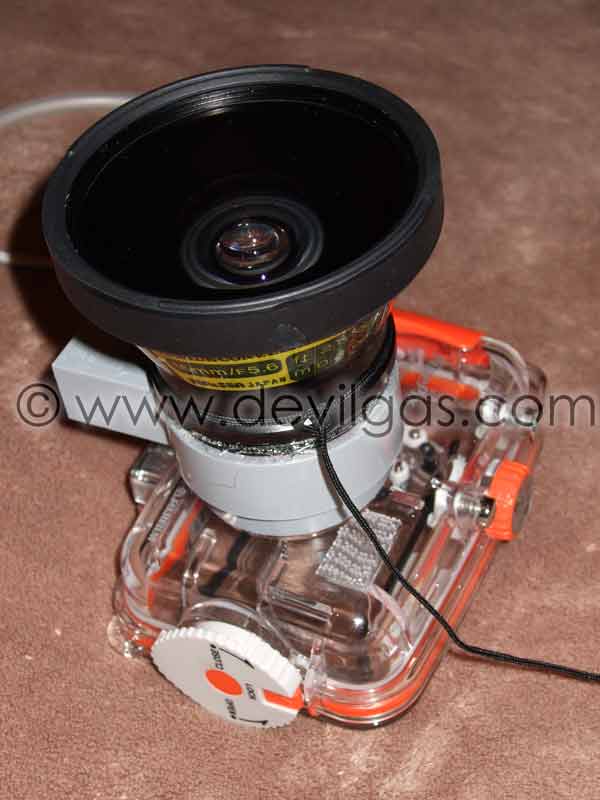
The DIY lens adaptor can be left in-situ as it doesn't interfere with the optics of the camera. The bracket contains another hole which can either be
used to create a more elaborate mount or to add some kind of security lanyard to prevent the bracket (and lens) from being accidentally lost.
The entire process, excluding time for the epoxy to set (prototype 1 used hot melt glue), should take about 30 mins and my total cost was £55.
Clearly, if you already have a MM2 add on lens, then this will reduce your costs to about £20.
One final tweak is to cover (paint) the front of the camera lens barrel (the bit that says Fujinon Zoom Lens etc) with matt black as this can reflect
onto the wide angle lens under certain lighting conditions (the camera pointed towards the sun etc).
Testing
The adaptor was constructed early April '09 but due to a lack of gas and my local supplier being closed over Easter, it meant I couldn't get the unit
in the water on a proper dive, so resorted to plunging it into deep water pools at some nearby waterfalls. Not scientific as ideally I'd have liked
to have done measurements etc and calculate the field of view with both the 20mm and 16mm add on lenses attached. Didn't happen so this was the next
best.
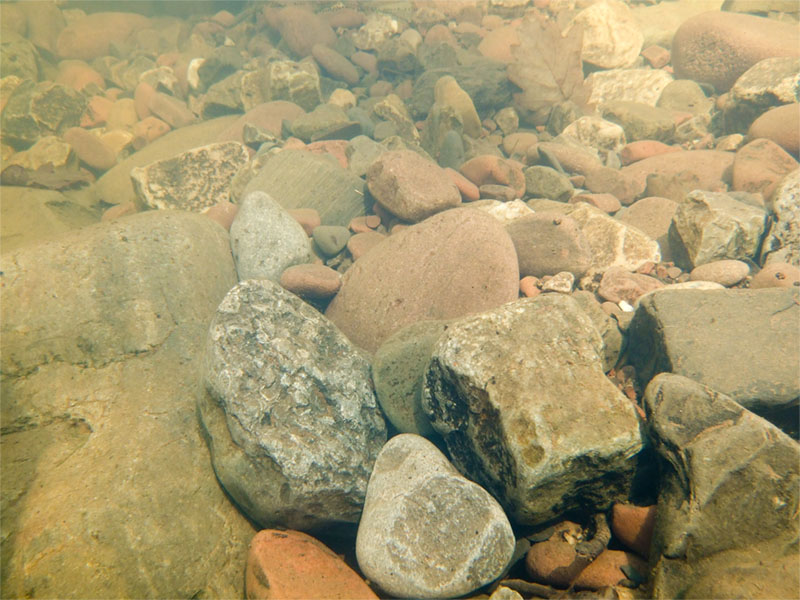
First shot is of some stones at the bottom of a small pool about 75cm deep using the F30 on the standard wide angle setting (f=8mm which has a full
frame equivalent lens setting of f=36mm) i.e. if the camera were an SLR, then the frame coverage would be the same as if the SLR had a 36mm lens attached..
Next photo is the same pool but with the 20mm lens attached and the F30 on full wide angle. Shooting position and direction was identical to the 'control'
shot. The viz was f**ked up courtesy of a curious hound jumping into the pool between me taking the control & 16mm shots and the 20mm shot.
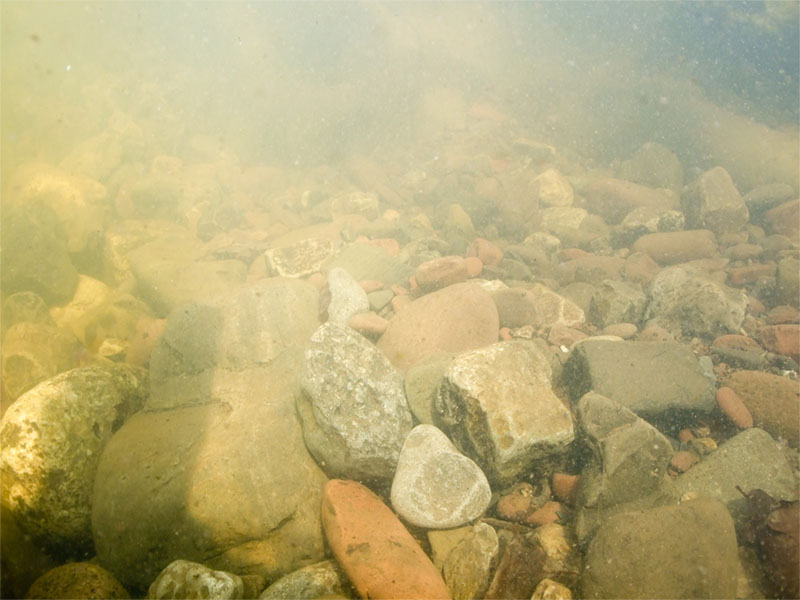
3rd photo is the same blah blah with the 16mm lens attached.
We can now add these as a composite to see the effect of each lens. Obviously, the widest image is from the 16mm lens, the image bordered in green is
from the 20mm lens and the image bordered in red is the standard F30 wide angle control photo.
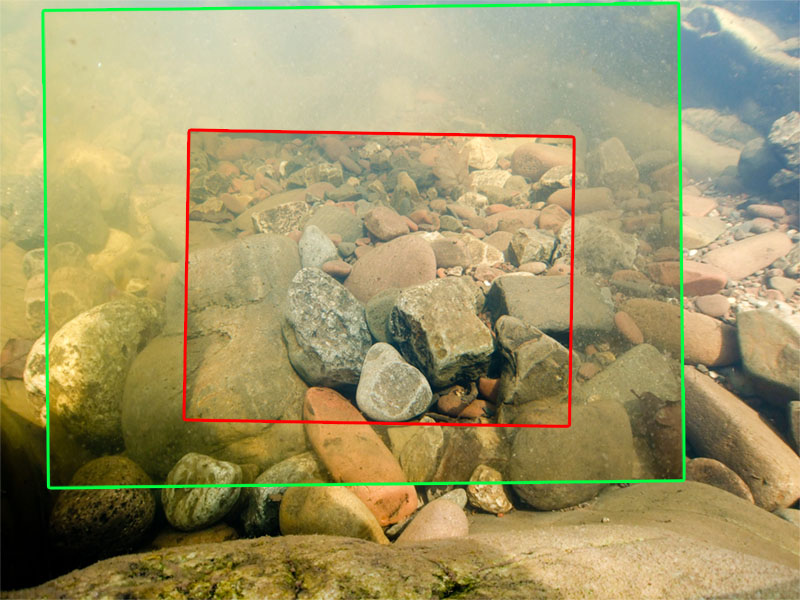
From rough measurements on the amount of scaling (46% to match the control to the 16mm lens and about 60% to match the control to the 20mm) taken to
create the above image, adding the Sea & Sea lenses to the Fuji F30, converts the camera (when zoomed out) to nearly that focal length, i.e. 16mm
and 20mm, and matches the multipliers for the lenses.
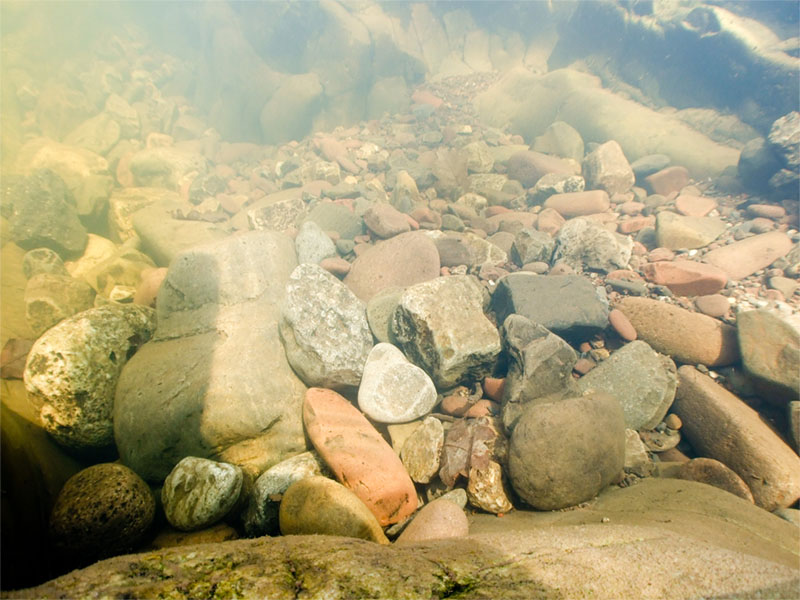
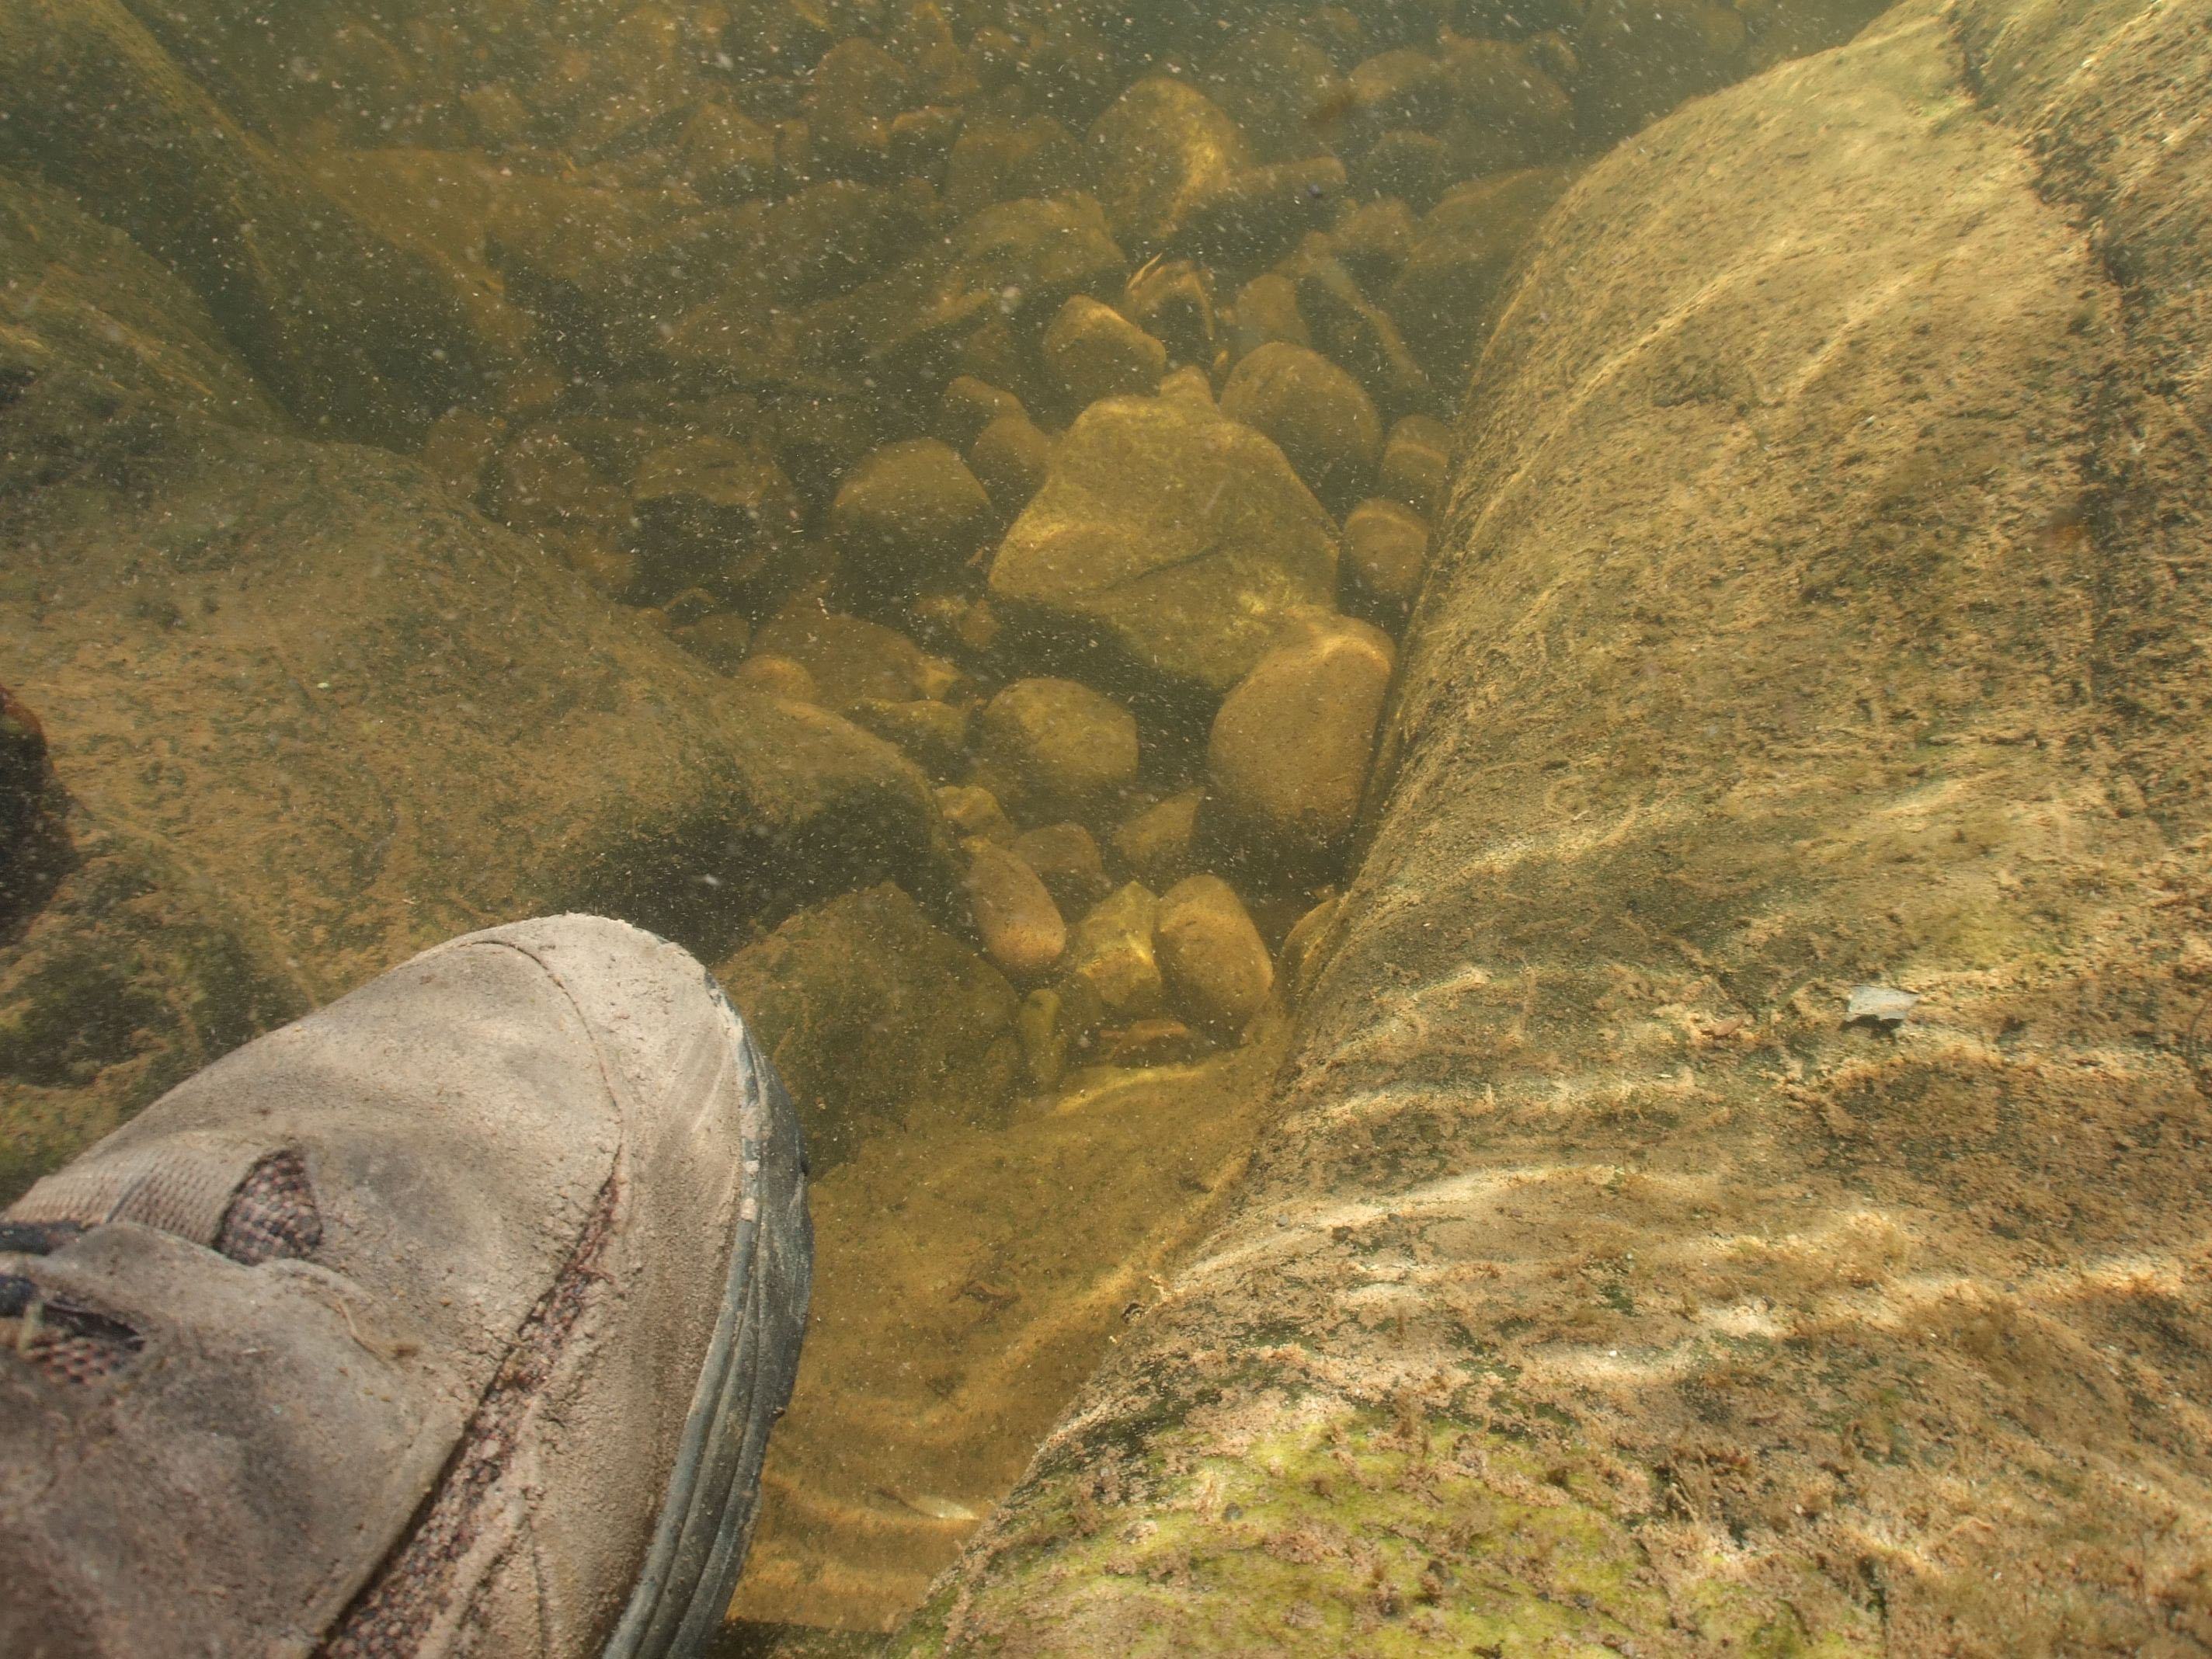
The next pair of test photos are of a deeper pool (I'd estimate the stones to be at about 4ft (1.3m) depth and the distance from the camera about 1.5m.
My foot in the foreground was about 30cm from the camera.
The (slightly blurred) F30 'standard' wide angle shot is here:-
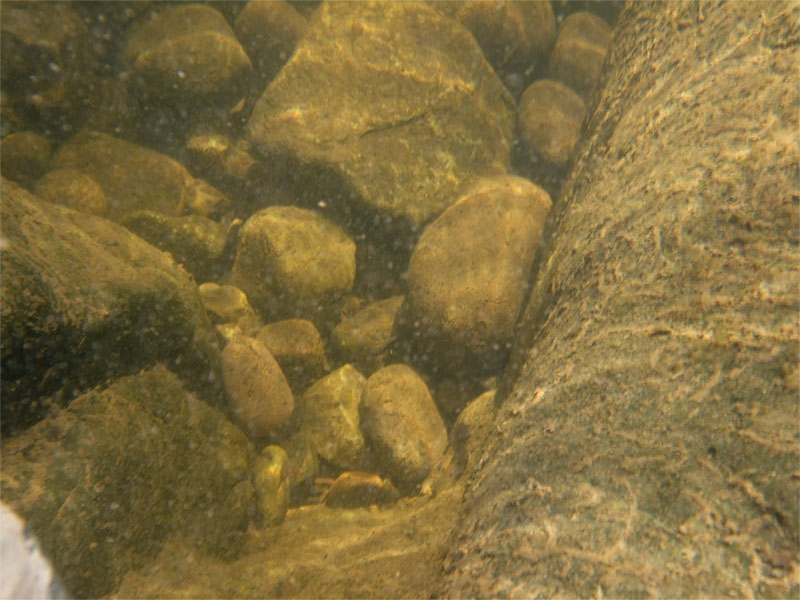
Photo details are:-
manual mode (S), 1/30s, F4.5, f=8mm (36mm equiv)
The 16mm add on lens wide angle shot is here:-
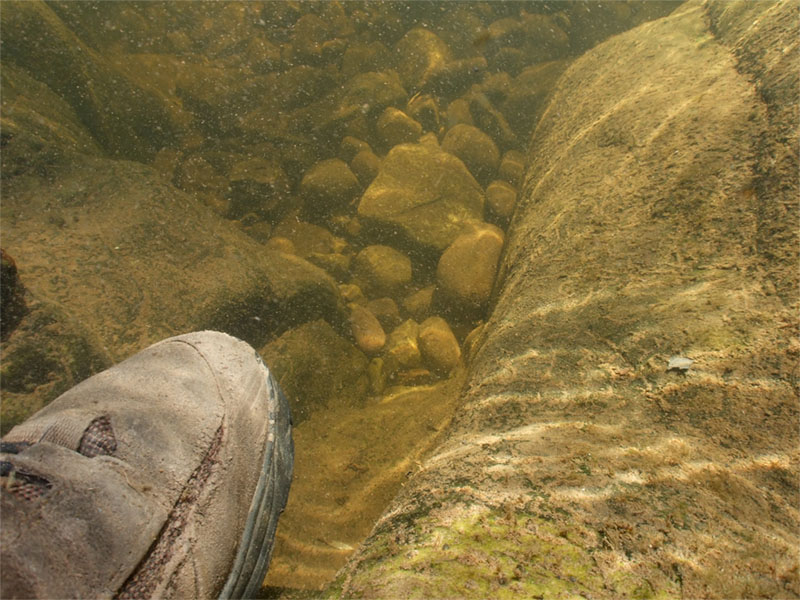
Photo details are:-
manual mode (S), 1/30s, F5, f=8mm (36mm equiv)
Again, an overlaid shot comparing the two photos (standard F30 wide angle bordered in red) is this....
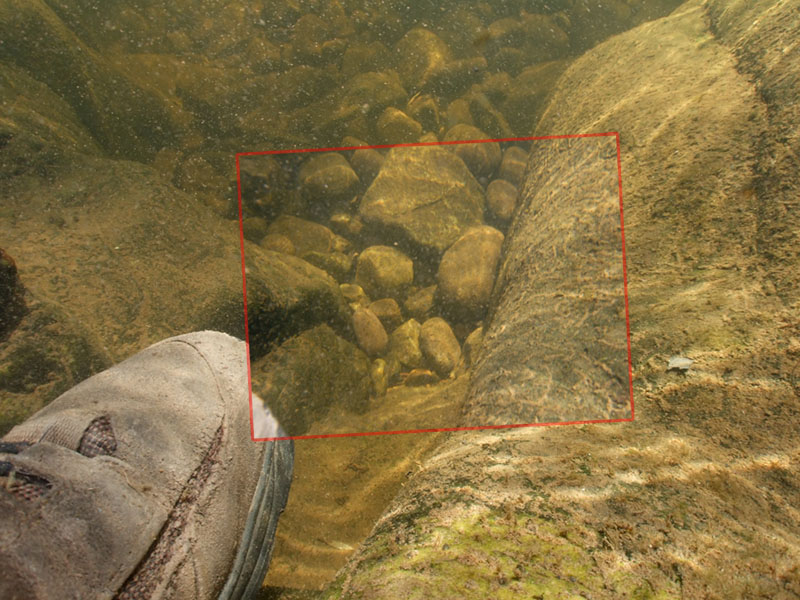
We can again see from the image, that adding the 16mm lens has significantly expanded the field of view.
Finally, the interesting thing to note is the sharpness of the photo with the 16mm Sea & Sea lens attached,
You can see the full, original, version here (1077 kb)......
Check out the edge sharpness and depth of field. The photo has NOT been sharpened in Photoshop etc. Other than saving in a lower quality to ease download
speeds (the original is 2.7Mb), the image hasn't been manipulated in any way.
Personally, I was quite pleased with the results and it shows that the setup does actually work.
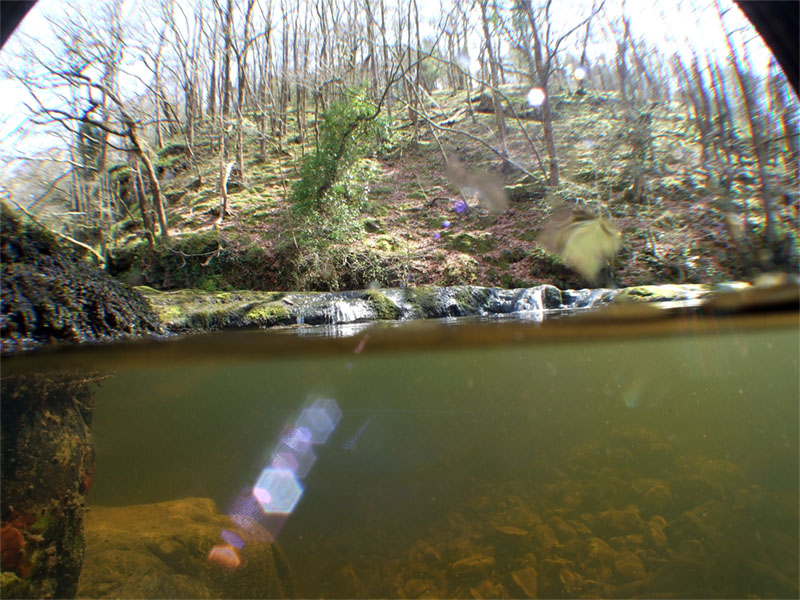
Finally, I tried a half in / half out of water shot. At full wide angle, the edge of the lens mount etc is visible. When underwater, this is not a problem.
Since first creating this page, the setup has been succesfully used on a shark trip in South Africa (images
here - most of which are shot at 16mm) albeit with the latest recommendation of using epoxy resin to mount the MM2 adaptor to the plastic pipe bracket.
Earlier on the page, I advised covering the front of the lens with black whatever. You can see the lens reflection issue on image 503 of the above link.
As for focussing, the F30 will focus (at full wide angle) from infinity to the lens actually touching the subject.
Why didn't you ....?
Mount the bayonet adaptor straight onto the housing?
I wanted something that would allow complete removal in case I needed to go the Inon fish eye route at a later time. Gluing the mount to the housing
would reduce the flexibility of moving the DIY adaptor between camera systems
Mount the bayonet adaptor direct to the 50mm pipe?
The material available to glue the 2 parts together wasn't that accessible meaning the joint may not have been so strong. Also, if that method were
done, the length of 50mm pipe would become much more critical
Build a more secure fitting by extending the bracket to the 1/4" tripod hole?
Having tried the pipe & inner tube fixing, it was deemed that this was sufficient for my needs. As I use a Sea & Sea tray with 1 or 2 strobes,
any support structure would also need to fit with the tray and as the tripod bolt included with the tray isn't too long, this would've involved more
effort than it was worth.
Just splash the cash on the Inon gear?
I'm a tight arse when it comes to stuff like this and if I can recycle old gear then that'll be my first port of call. Besides, watch the 2nd hand prices
of this stuff rise nicely as this info gets disseminated ;-)
Just buy the Fuji wide angle lens that was announced in April '09?
This idea was born before that solution appeared, and from the very quick search for those products, can be significantly cheaper than the £200+
for the Fantasea FWAL-02 lens (0.57x mag = 20mm equiv on the F30) and the appropriate adaptor.
Will this work with my XYZ camera and housing?
There’s no reason why the lens itself shouldn’t work, you just need to find some way of getting it mounted to the housing. If the
lens diameter on your camera is relatively wide e.g. the 5060 has a lens diameter of about 35mm which doesn't get that close to the front of the housing
port, then the chances are you’ll get some / severe vignetting. The image shown here
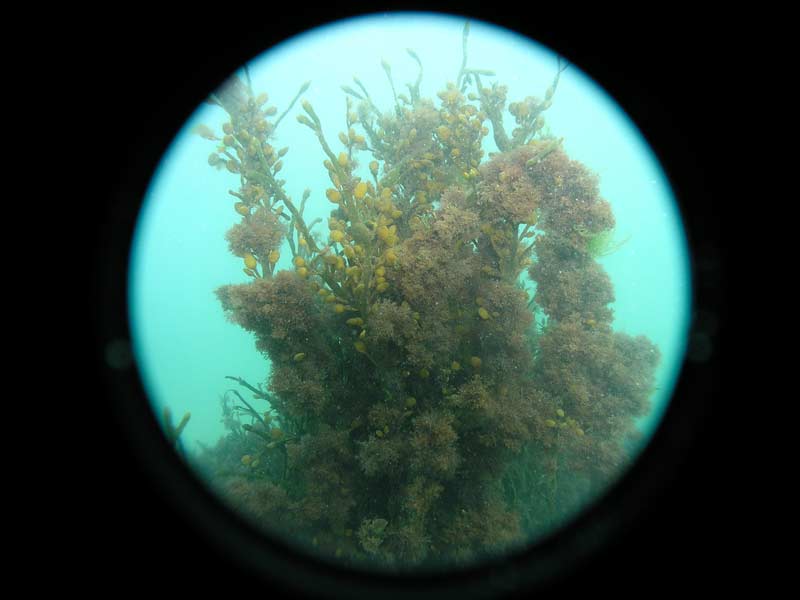
is the result of using the 16mm lens on the Oly 5060 with, shock horror, the proper Sea & Sea lens adaptor. Looking at later Fuji housings, they’ve
gone for the square window front port so an alternative mounting method will need to be sought. My initial thoughts for this project were to create
an adjustable mount that would tie into the tripod socket at the base of the housing. The downside to this is that I also use flash mounting brackets
so any solution would, for me at least, need to accommodate the bracket as well. You can of course just hold the lens in-front of the housing, however
that would soon get very annoying.
Can the wide angle lenses for the Motormarine MX10 , MM3 etc be used?
No reason why not, however you'd need the appropriate mount as they are allegedly different to that found on the Motormarine 2.
What about the 2T and 3T macro lenses?
I hadn't really considered these until a conversation had ensued with Stephan Hoenig. Results can be found on this page
I have a feeling that the Sea & Sea wide angle lenses may become a little popular on ebay ;-)
| v1.3 | 11th Sept 2009 | Macro notes added |
| v1.2 | 31st May 2009 | A few other notes added |
| v1.1 | 13th May 2009 | South Africa usage and epoxy resin recommendation added |
| v1 | 26th March 2009 | Page created |